

")
My old laptop still performs well, so it felt like a waste to change it just because it lacked a dedicated GPU. I always knew that DIY EGPUS was present, but I avoided them because I thought they would do a lot of work to build – I was wrong.
Why did I make my own egg
The decision to make my own EGPU (external GPU) came for pure practicality. My Lenovo X1 performs beautifully for carbon writing, web browsing and most productivity functions. But the moment I tried to demand anything more than the basic Indie Games, or when I needed to edit QHD video footage, the boundaries became clear.
I considered buying a gaming laptop, but felt that such an expensive solution was not required to throw money on a problem. In addition, many gaming laptops are heavy, battery life is low, and I like the portability of my current laptop. The X1 carbon fits perfectly in my bag, always walks silently, and gives me the whole day battery life.
A DIY EGPU provides the correct agreement. When I need it, I get closer to the performance of the desktop-level graphics, but I can still take my laptop and head into a coffee shop without walking around a large-scale gaming machine. In addition, the construction of my own setup is much lower than buying pre-constructed EGPU enclosure from major manufacturers.
The tipping point came when I realized how much time I was spending many tools to manage. Before my Egpu Dock, I had to add four or five different cables every time when I used to sit on my desk. Now, I plug into a Thunderbolt 4 cable and everything works. Dock handles my monitor, charges my laptop, and provides all the ports required for its peripheners.
Step-by-step guide for the construction of your own EGPU
There are some things that you need to learn about an EGPU, before you start building one. However, if you are mainly looking for flexibility, as I do, the creation of EGPU is the best solution.
You need to create an EGPU
")
Just a few major components are required for the manufacture of EGPU:
- graphics card: I chose an RTX 2070 because it already has me, but any desktop GPU will work, based on your performance needs and budget.
- power supply unit: I used a season focus 500W ITX PSU, which provides great power for most graphics cards. You can use about any PSU. Most EGPU docks today provide growing brackets that can adjust most standard PSUs.
- Egpu dock: I am using one TH3P4 Thunderbolt GPU Dock With 85W power delivery option, serving as a foundation. The most convenient option should be to obtain thunderbolt EGPU dock until your laptop has an ooculin port.
- Thunderbolt cable: Usually involved with dock, it handles both data and power delivery. If you plan to buy your own, remember that USB-C and Thunderbolt cables are not always the same thing. Be sure to check the cable specifications.
- Thunderbolt control center software: Is available from Microsoft Store For management of connections.
- GPU Driver: Depending on your graphics card, download the latest driver from Nvidia or AMD.
The total cost for my specific setup will be around $ 430 (including GPU and PSU), which is much lower than buying a pre-made EGPU attachment and a graphics card. Most commercial EGPU solutions start at $ 300 for enclosure just before you add a graphics card. Of course, if you already have an additional GPU and PSU, you will only have to pay for the dock, which is about $ 120. You may also get cheap docks, but I chose the Th3P4 dock as it involves the underlying power delivery and the daisy-chain additional thunderbolt device supports the device.
How to assemble and configure egpu
Your EGPU may find it difficult to set, but you will find that it is very simple as expected the most. You will not need to mess up with complex software or hidden settings. Just assemble the parts, install the drivers, and it would be good to go to you.
Start by preparing your EGPU dock. Attach the growing bracket, which will safely hold both your graphics card and power supply unit. The brace ensures that nothing is loose when you run up and run.

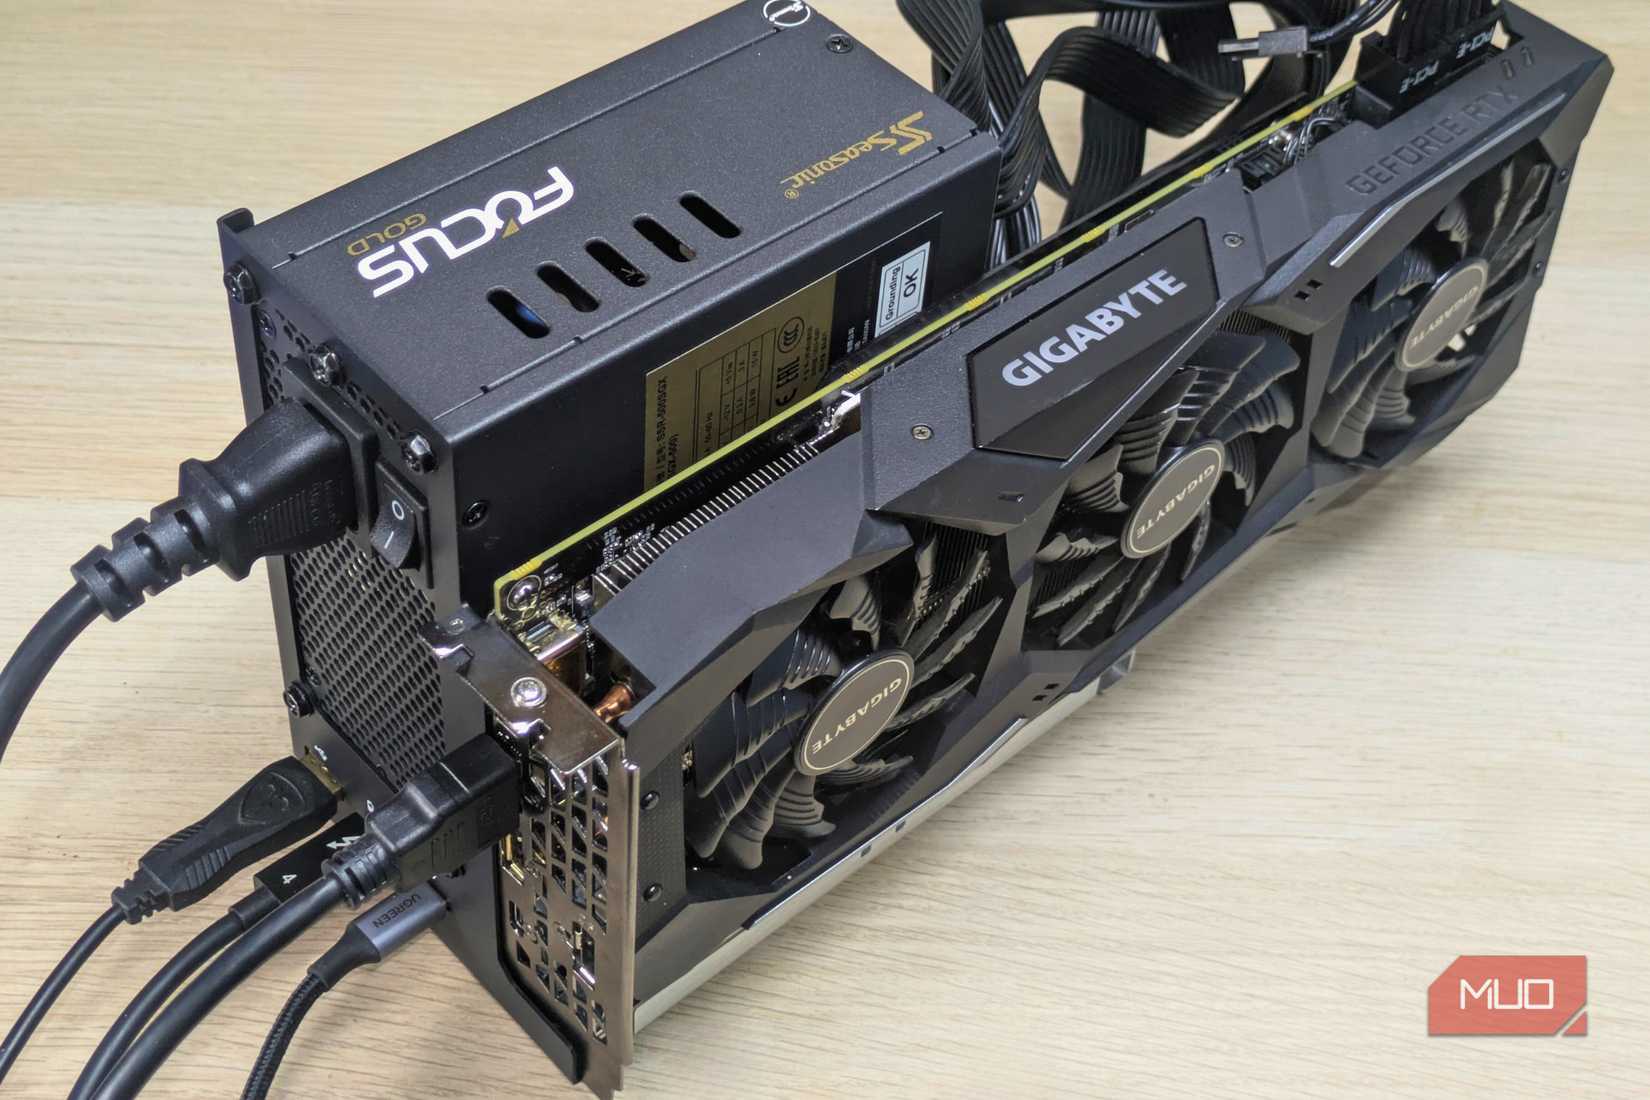
Once you receive the bracket, secure the power supply unit. It is best to give PSU a position, so the fan faces the outward, ensuring that your GPU does not block the airflow after the EGPU is fully assembled.
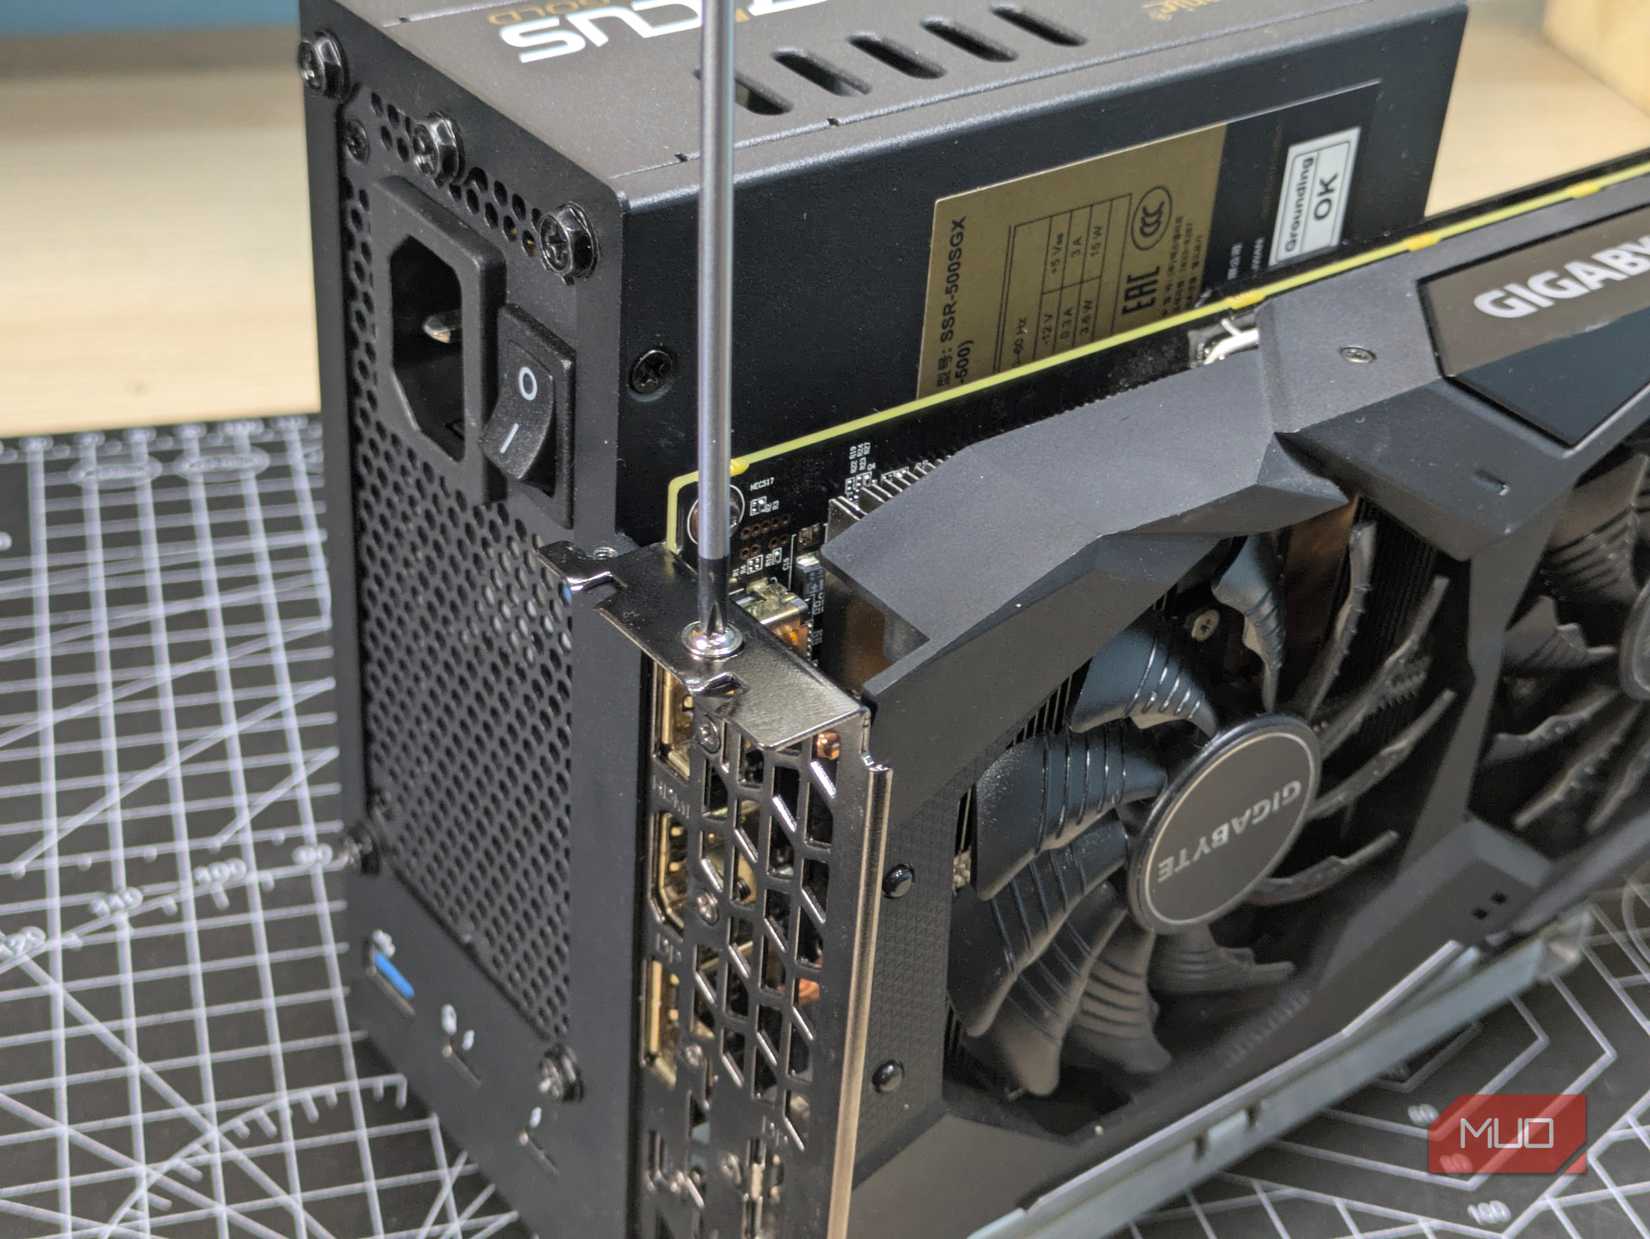
Now pick up your graphics card and gently slide it in the PCIE slot on your dock. When it gets line and is completely seated, fasten the bracket with a screw to keep it solid.
The next step is to plug into all your power cables. Connect the 24-Pin (Motherboard) cable to a dock, add 4+4-pin (CPU) cable for peripheral charging, and then attach both 8-pin and 6+2 PCI connectors to the GPU. Double-check that every connection is snag.

Once the hardware is in place, go to your laptop. Download and install Thunderbolt control center From Microsoft Store. This app helps your computer to see and manage all the thunderbolt devices, making it an air to connect your EGPU.
Now, take your thunderbolt cable and connect the EGPU to your laptop. Make sure you connect the cable to the thunderbolt port (one with the Thunderbolt logo) of your laptop and not regular USB-C port. An EGPU requires a thunderbolt protocol, which does not exist in all cables using the USB-C interface.
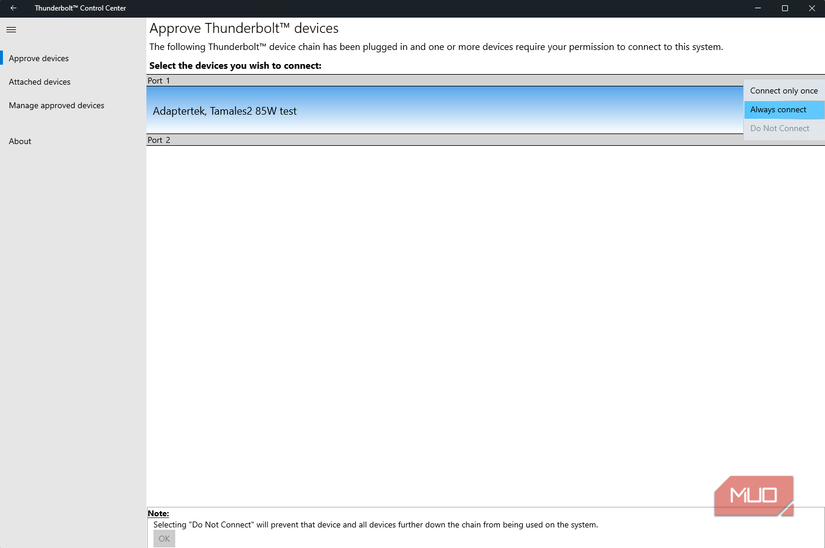
Open Thunderbolt Control Center. Your new EGPU should be seen almost immediately. If it does not connect automatically, you can click Add And determine preference Always connectIn this way, you will not have to approve the connection every time you do the dock.
After that, go on Nvidia Or AMD Website to download the latest drivers for your graphics card. Install them, and see the GPU control panel icon to be displayed in your system tray. If you see it, you are all sets. Of course, you can also install GPU-Z To check if everything is working with EGPU.

For best results, connect your exterior monitor directly to EGPU’s video output. This ensures that your desktop is all heavily lifted by your desktop GPU instead of the underlying graphics of your laptop. You will promote a quick performance when you demand creative apps and using a high-resolution display.
You can expect the entire process to take about twenty to thirty minutes, most of which come from collecting hardware. The software side is quick and automated. Once your driver is installed, you are ready to enjoy your upgrade setup.
An EGPU dock is not just about gaming
Beyond promoting clear graphics performance, my EGPU Dock has changed how I work on my desk. 85W power delivery means that my laptop charge is connected, so I never need to worry about battery life during long gaming sessions or intensive work projects.
Dock Thunderbolt-supported gaming works well with handheld and mini PC. When a friend travels, they can bring their laptop or gaming handheld; I allowed them to use EGPU, and I use my desktop PC. In this way, we both play the co-up game together.
Port expansion easily creates an EGPU dock that you can get today is one of the best docking stations. My EGPU dock contains many USB ports, which I use for my keyboard, mouse and other external devices. Earlier, I continuously ran out of the ports on my laptop and had to use a separate USB hub. Now, a Thunderbolt cable needs all my laptops.
Overall, the setup actually seems to plug-end-play thanks to the Thunderbolt Control Center app. When I arrive at my desk, I connect a cable and within seconds, I have access to a dedicated graphics card, a large monitor and all my external equipment. When I need to leave, I safely disconnect through software and catch my laptop.
The construction of my own EGPU is one of the most satisfactory DIY technology projects I have completed. This solved my graphics performance problems without compromising me on portability or forcing me to spend a luck on a new laptop. This setup gives me flexibility to handle deeper tasks graphically when I need to do so and stay mobile.